
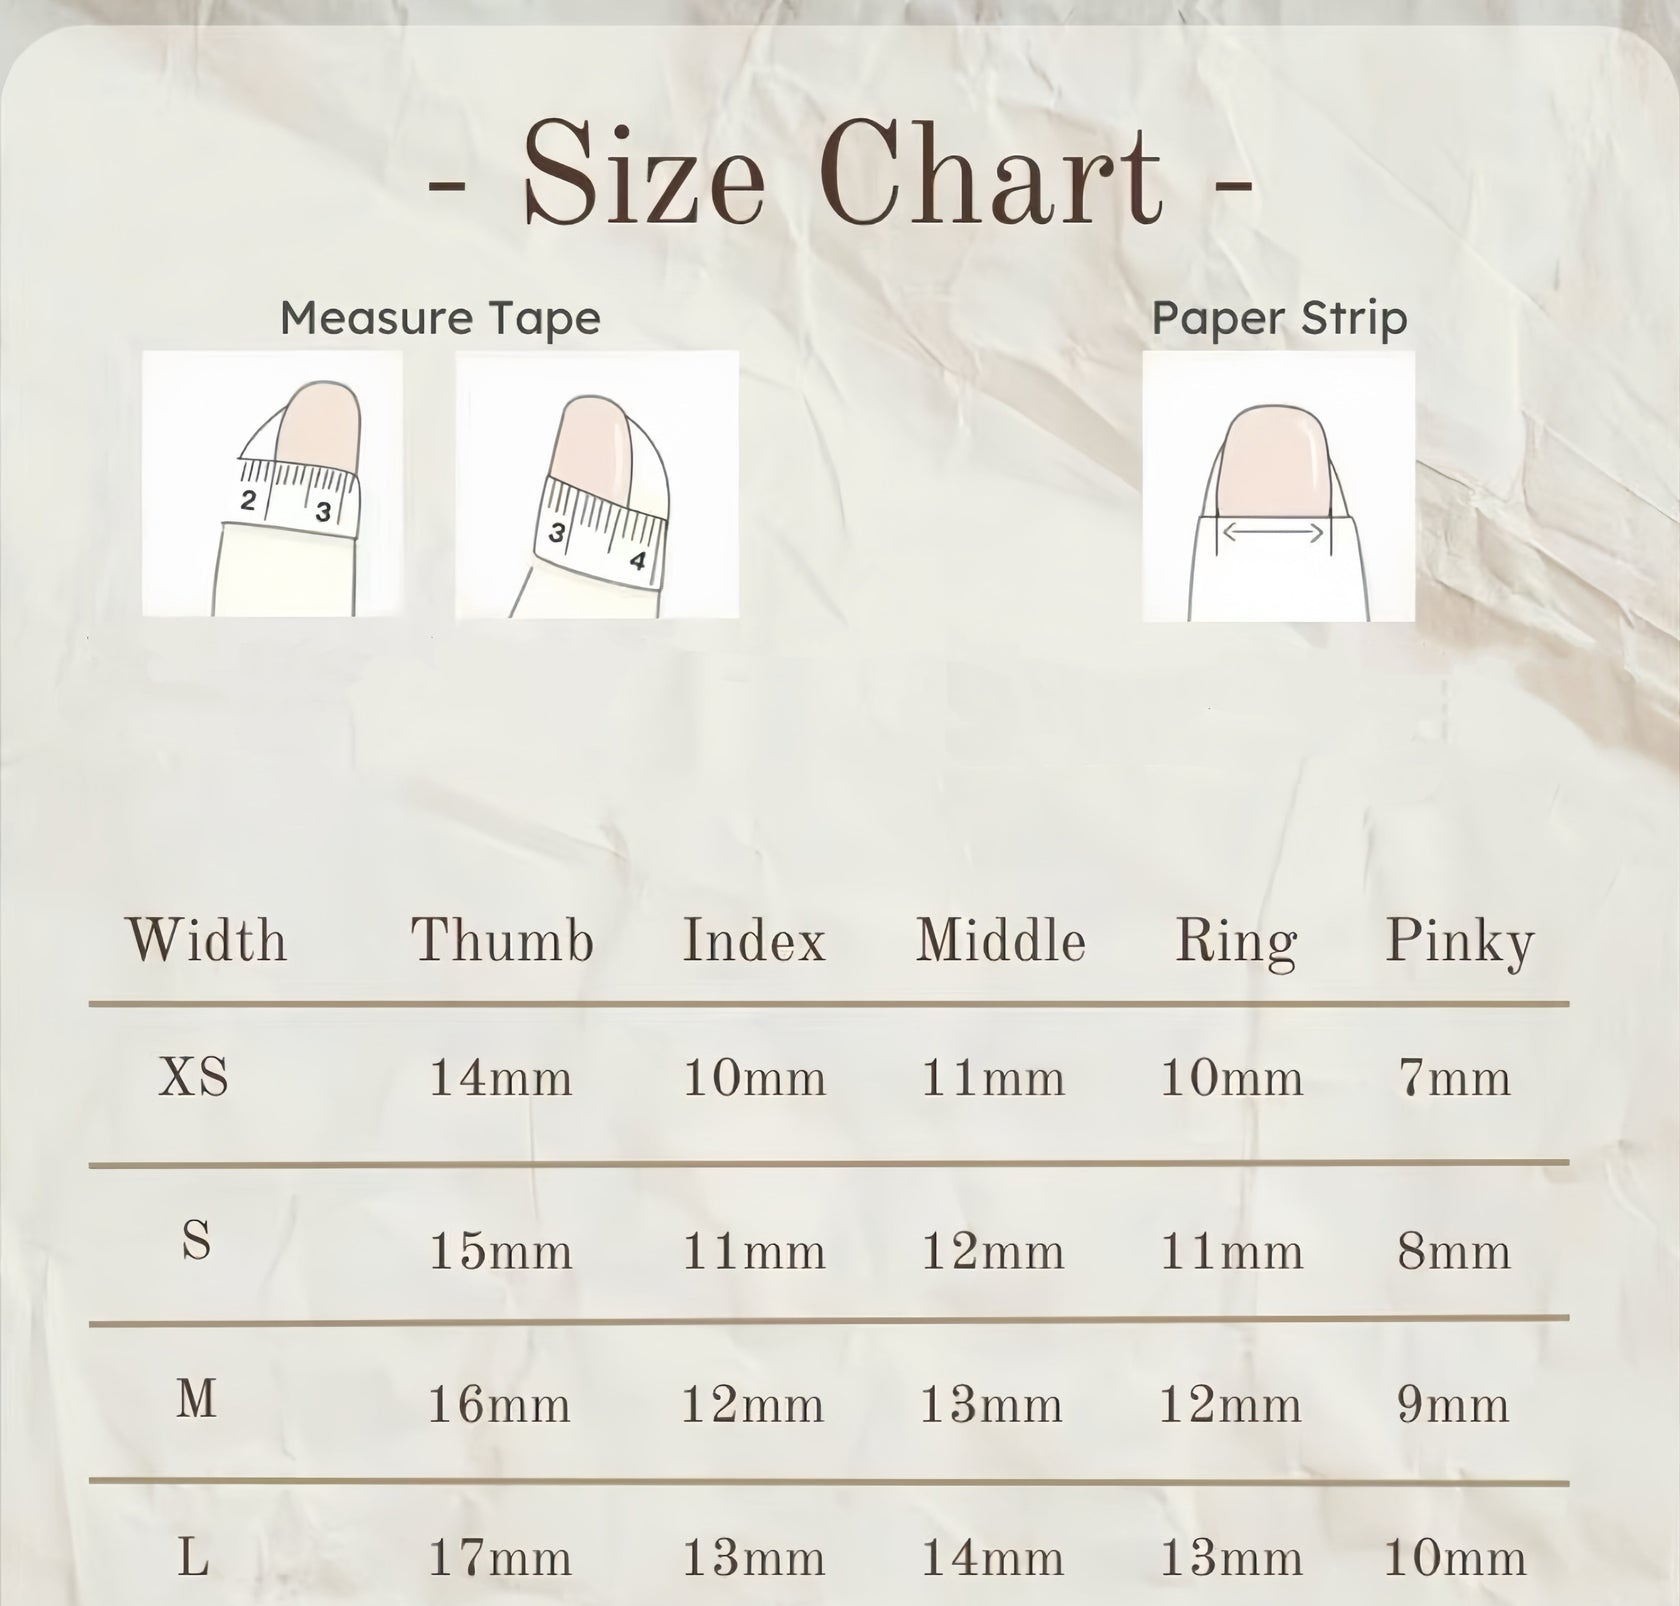
SIZING TIPS
- L size is offered for selected styles and are available by pre-order.
- Choose the size that fits most of your fingers comfortably.
- If your measurements fall between sizes, it's generally recommended to size up.
For example, if your nails measure approximately 14.5mm, 10.5mm, 11mm, 10mm, and 8mm—between XS and S—it’s best to choose size S. - Some styles may fit slightly smaller. You’ll find ‘True to Size’ or ‘Runs Small’ details listed under each nail style for easy reference.
Note. Please correctly measure your size before placing an order. Due to hygiene reasons, we do not accept refunds if you select the incorrect size.
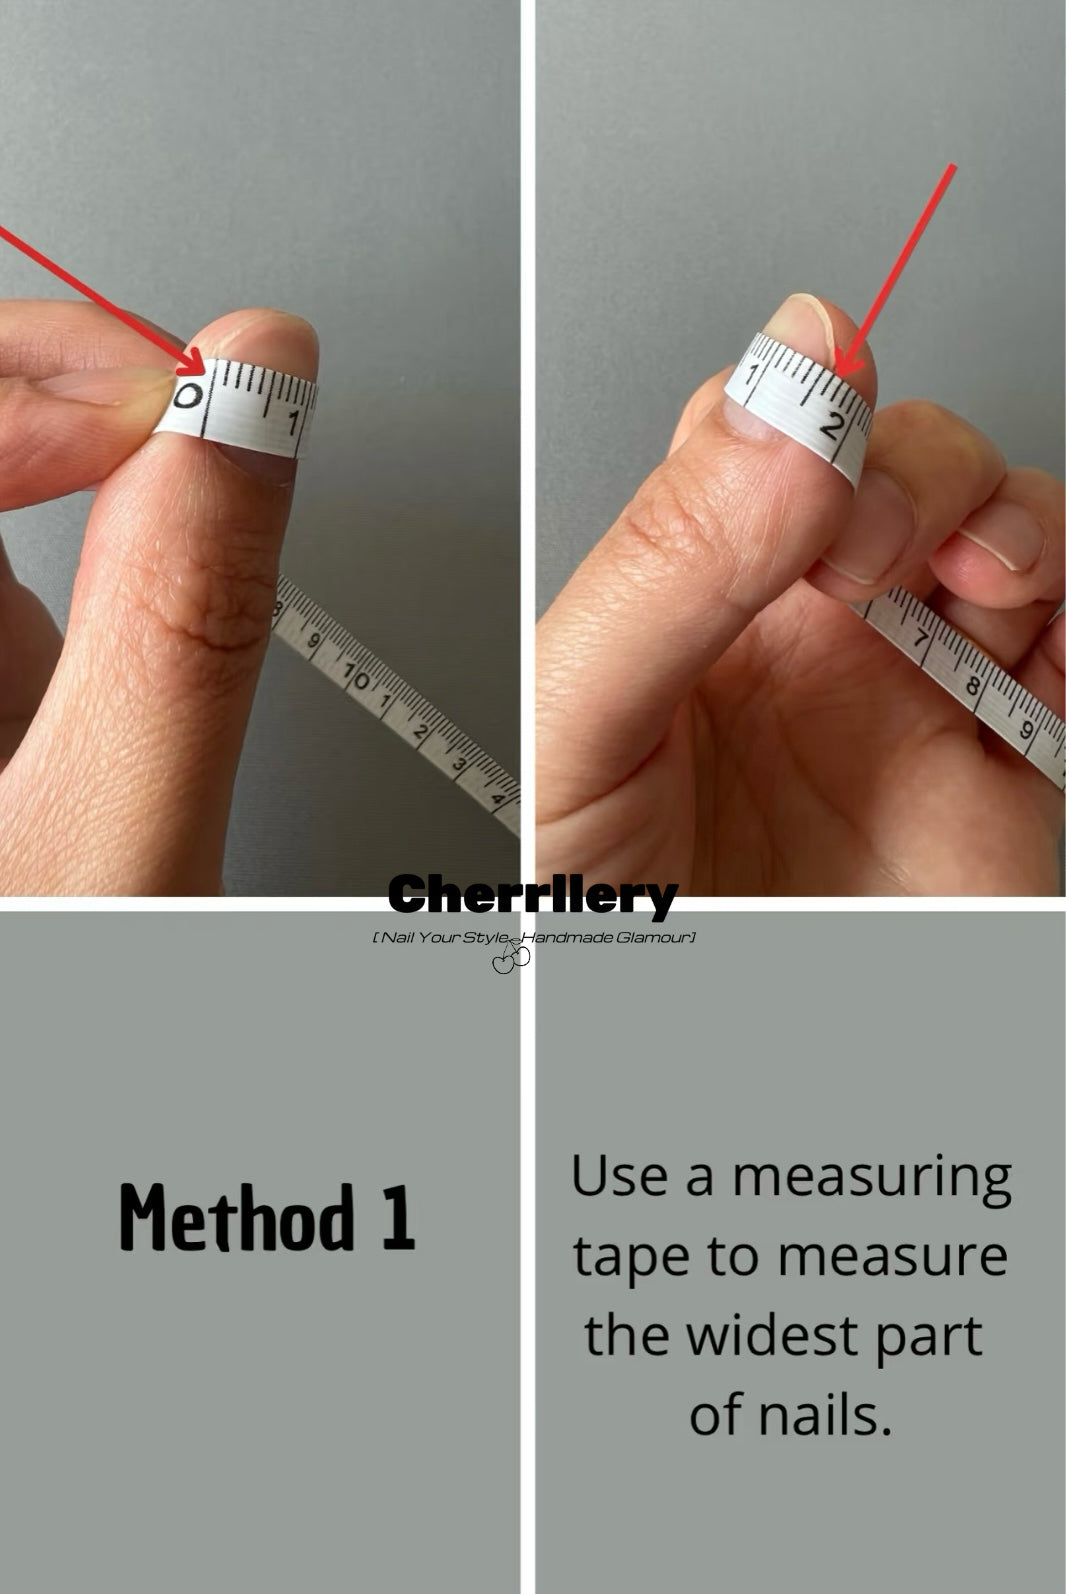
HOW TO MEASURE
Measuring Tape:
Use a soft, flexible measuring tape, and measure the widest part of your nail bed.
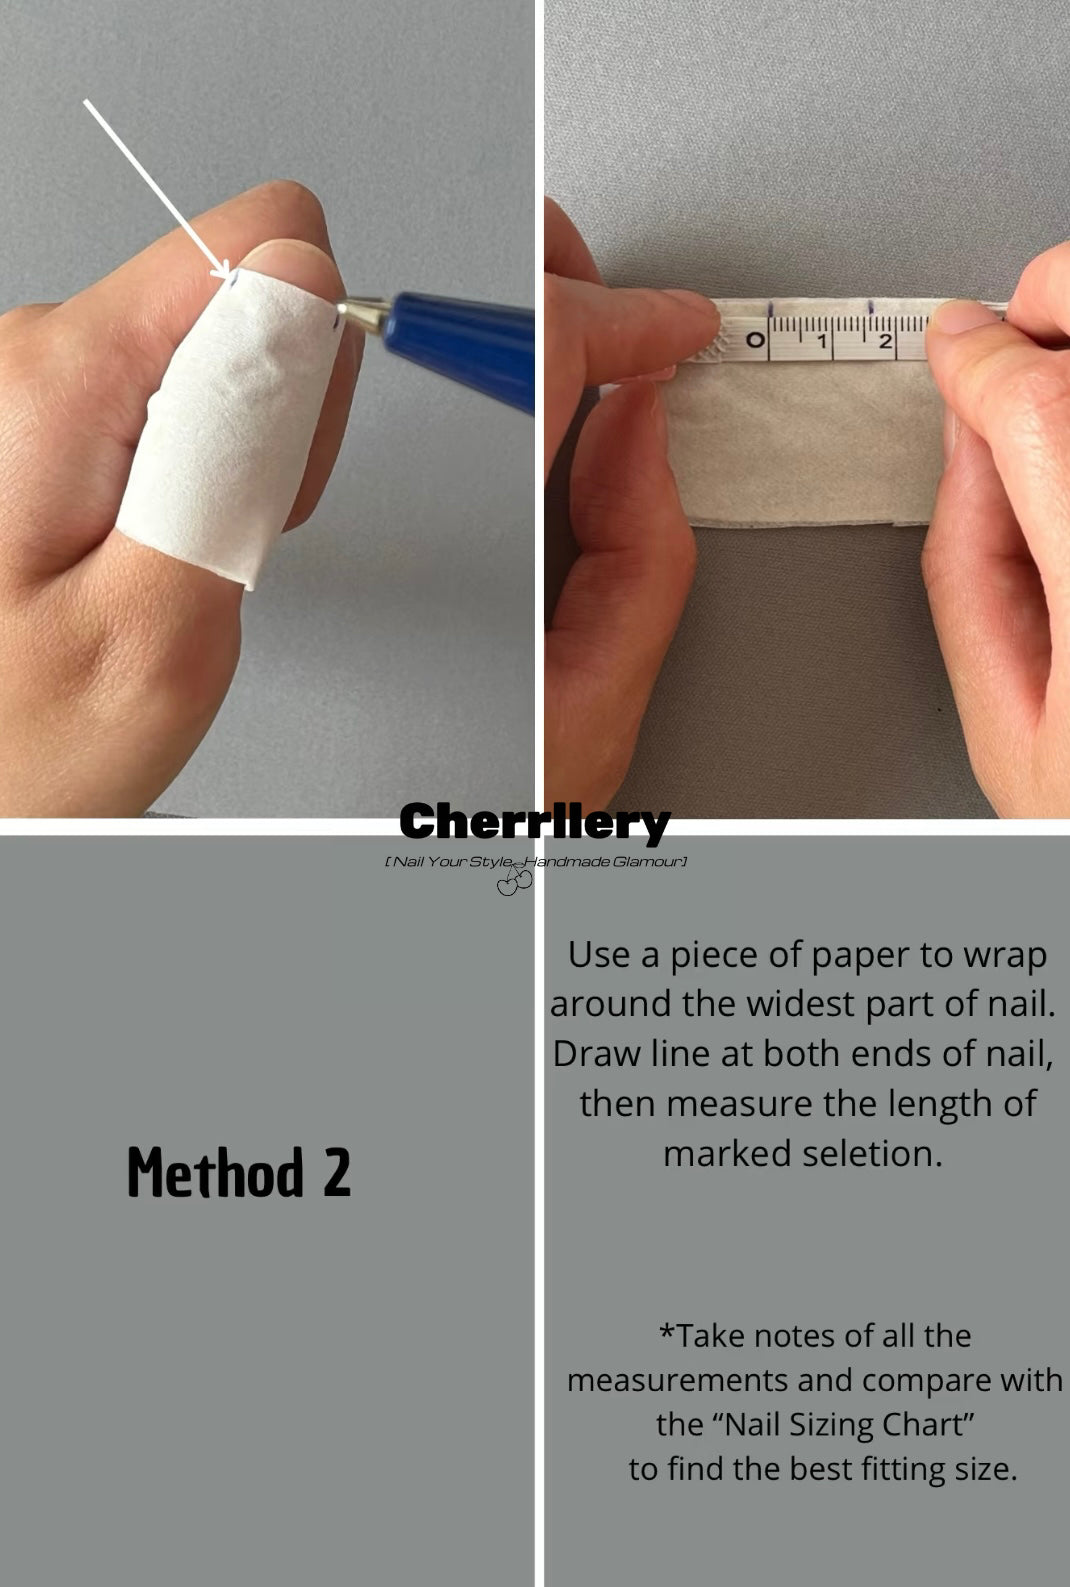
HOW TO MEASURE
Ruler:
Use a piece of paper to wrap around the widest part of nail and then measure the length of marked selection.
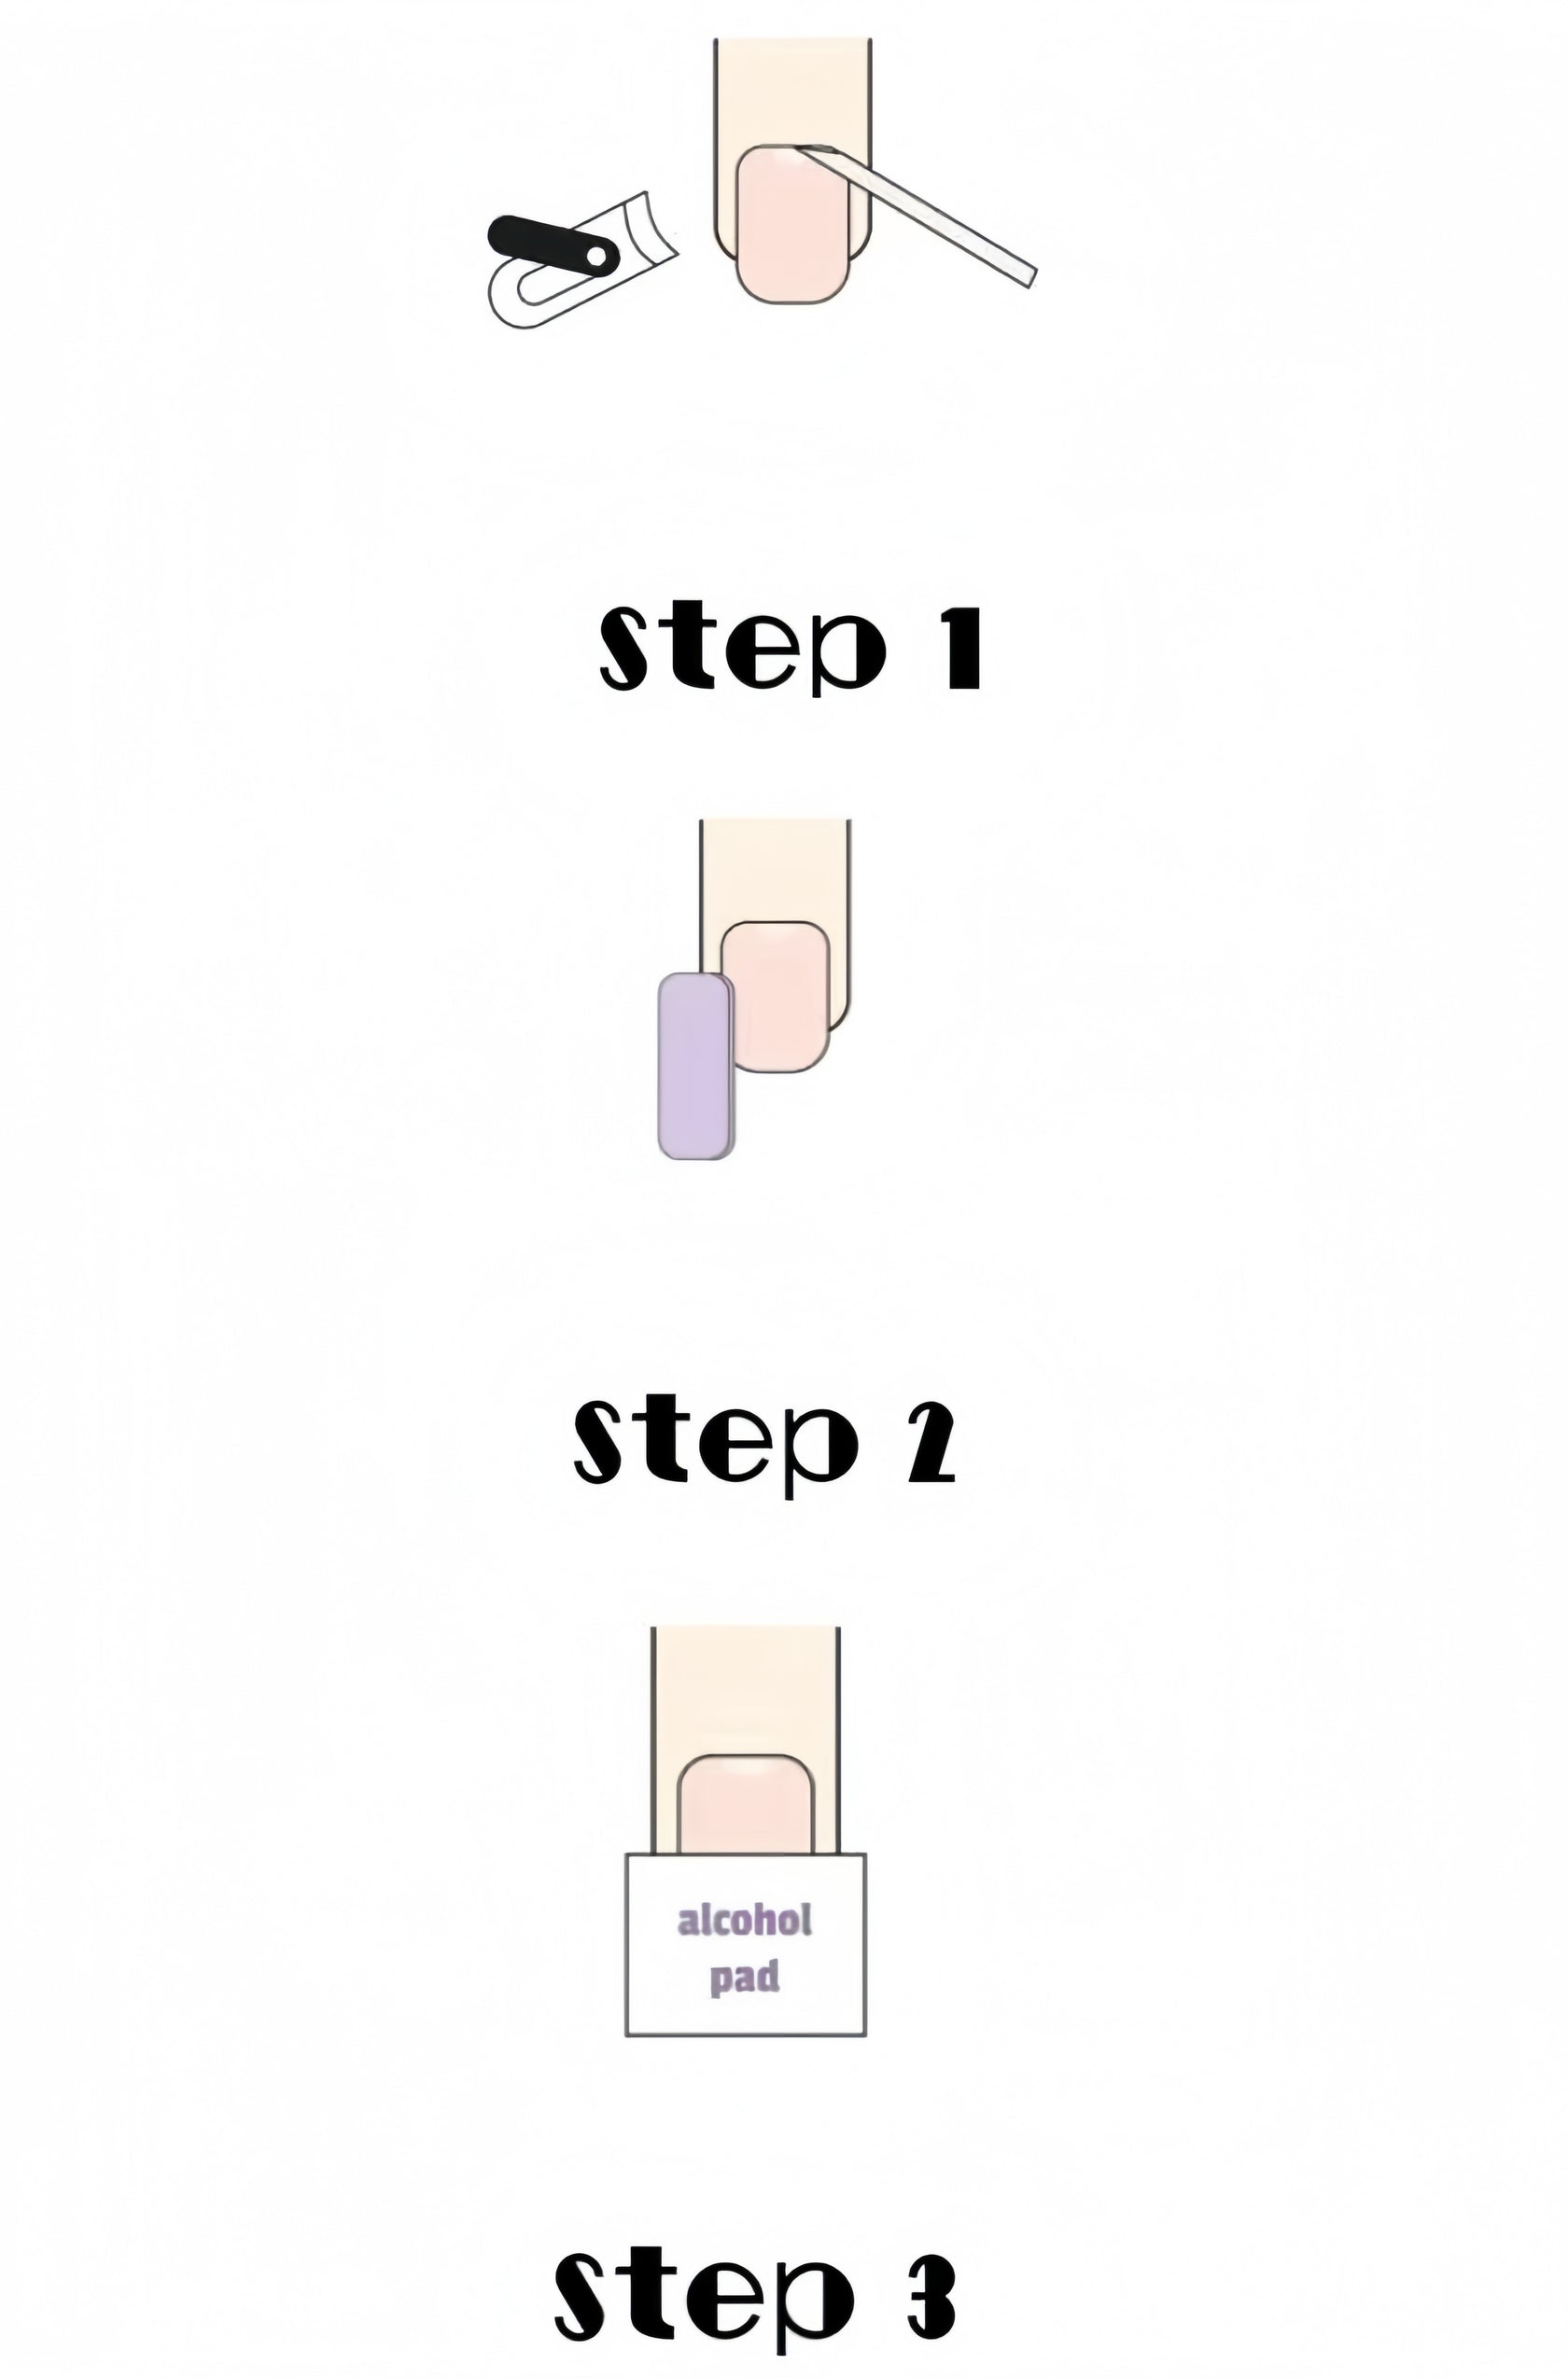
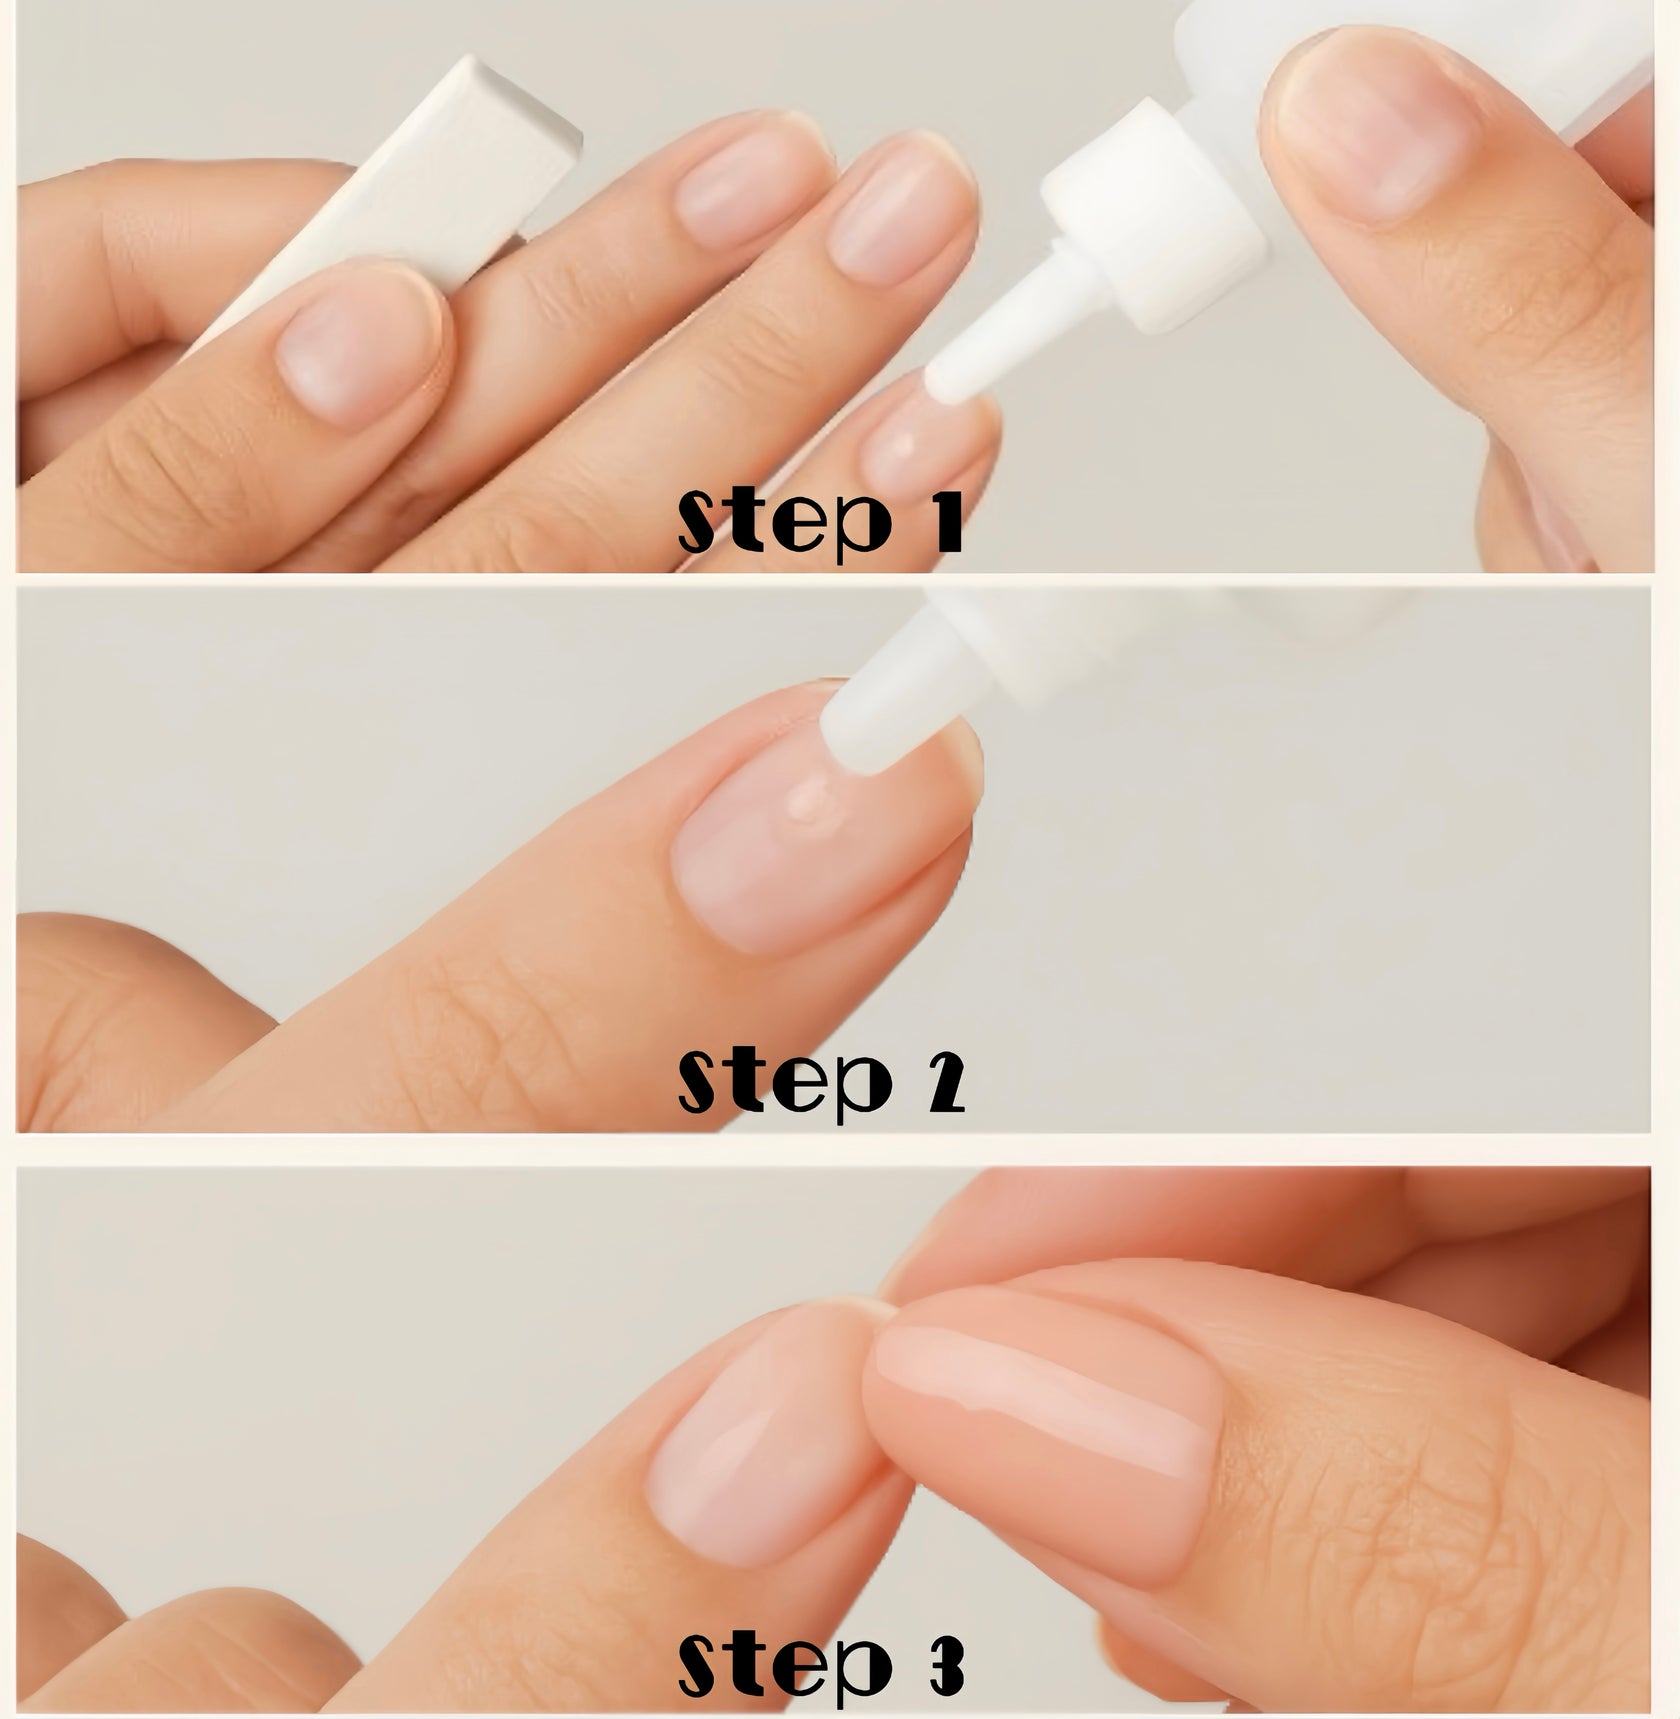
HOW TO PREP YOUR NAILS
Prep is everything! A little extra care before application will help your press-on nails stay secure and last much longer.
Step 1. Wash your hands thoroughly with soap and water to remove any oils or residue. Gently push back your cuticles with a cuticle pusher or orangewood stick. This creates a clean surface and prevents lifting.
Step 2. Lightly buff your natural nails to remove shine. This helps the adhesive stick better.
Step 3. Use an alcohol wipe or cotton pad with nail cleanser to remove any remaining dust and oils. Let your nails dry completely.
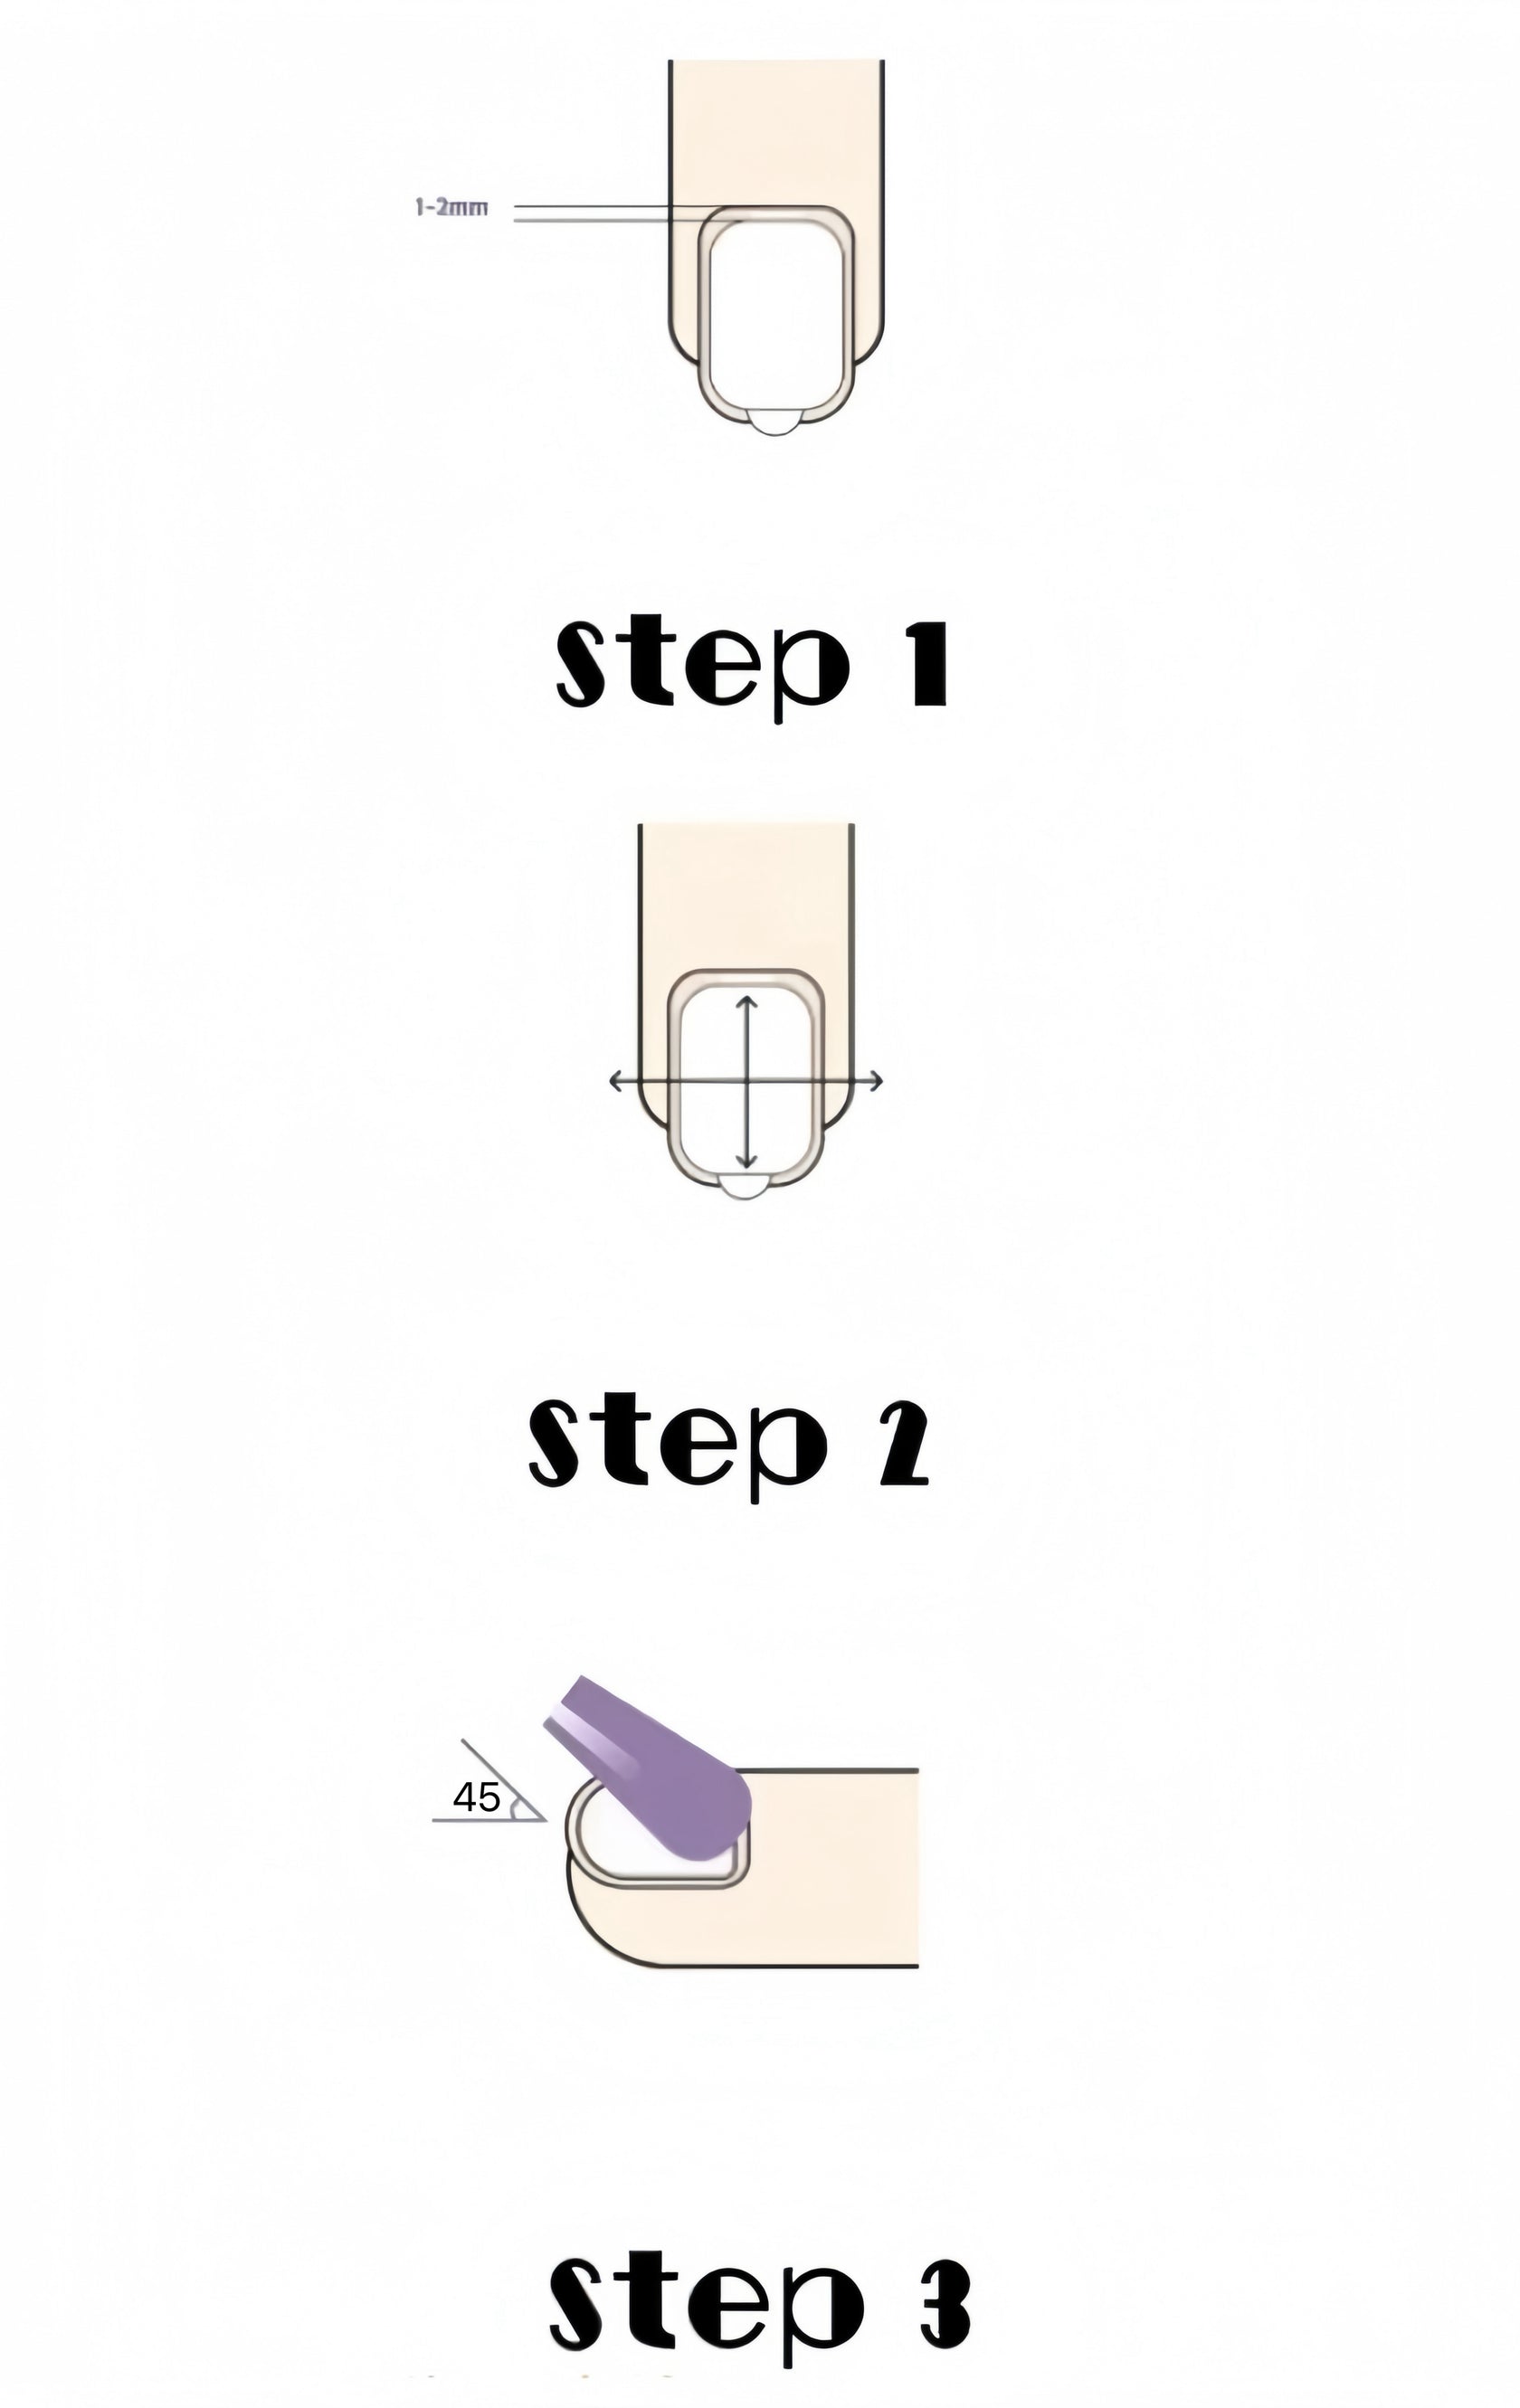
APPLY WITH STICKER TABS
For shorter wear (1–3 days) and easy removal
Step 1. Choose sticker tabs that match the width of each natural nail. Place it sticky side down onto your natural nail, leaving a 1–2 mm gap between the tab and your cuticle area.
Step 2. Press firmly to remove any air bubbles and make sure the tab fully covers the nail for a secure hold.
Step 3. Remove the protective film from the top of the tab. Align the press-on nail with your cuticle and press it down onto the tab. Hold firmly for 20–30 seconds to secure.
Note. avoid water or heavy use for the first 2 hours to help adhesion set.
TIPS TO MAKE STICKER TABS LAST
Tip 1. Before removing the protective film from the tab, use a hairdryer to blow on the tabs for a few seconds to slightly melt the glue and increase stickiness.
Tip 2. Be sure to spread the tabs thoroughly towards the edges.
APPLY WITH NAIL GLUE
For longer wear (up to 2 weeks) and a stronger hold
Step 1. Apply a thin, even layer of glue to your natural nail.
Step 2. Align the nail with your cuticle, leaving a tiny gap (about 1-2 mm) to avoid overlapping the skin.
Step 3. Press down firmly starting from the cuticle area and working toward the tip.
Note. avoid contact with water or lotions for at least 1 hour after application to allow the glue to set fully.

HOW TO REMOVE PRESS-ON NAILS
If You Used Sticker Tabs
- Starting at the side of the nail, gently lift the press-on nail.
2. Use a cotton pad with rubbing alcohol to clean off any leftover adhesive.
If You Used Nail Glue
1. Fill a bowl with warm to hot water (comfortable to touch). Add a few drops of mild soap, oil (like makeup remover oil, cuticle oil, or even cooking oil) to help loosen the glue.
2. Place your fingertips in the mixture and soak for 15–20 minutes.
3. Starting at the side of each press-on nail, slowly lift and wiggle it free.
OR
4. Apply nail glue remover around the edges and underneath the press-on nail. Let it sit for to start breaking down the adhesive.
5. Starting at one side, slowly lift the nail.
Note. Nail glue remover is designed specifically for dissolving adhesive and can make removal faster and easier.